Real Deer Forms
I'm starting with the small deer and working my way up in sizes.
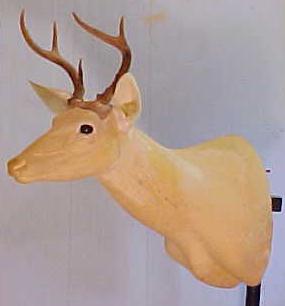
Proto-type sculpture for whitetail deer taxidermy form with nose to eye measurement of 6 1/2" and 15" behind the ears.
The "LOOK"
People see deer. They know what deer look like. The deer observed may be from just about any where, a state park, a deer park, a zoo, peoples' back yard, peoples' front yard, a soybean field, a weed field, or a wood lot.
A hunter that spends time in a tree stand is probably going to make a few more observations than the average person. The thing that all the observers will have in common is that visual image is going to get burned into the mind.
That "LOOK" of graceful curves and flow from one part of the body into the other is of importance to me. Others saw it and I have to duplicate it.
This sculpt is not ready for mold making yet, but getting real close. I still have tweaking to do on the head, and a little more definition of neck muscles. I feel comfortable with the "LOOK", I believe you'll be able to take the finished form and turn a spike, fork horn, or basket rack into a pretty mount.
Glen
Manufacturing and distribution of the REAL DEER series whitetail deer taxidermy forms will be done through:
Quality Taxidermy Supply Taxidermists' Supplies & Services
2186 Southwood Road
Kinston, North Carolina 28501
Fax & Phone: (252) 527-8722 Toll Free: 1-888-527-8722
I'll be darned, he did photograph in black primer. Click here to see. here
February 1, 2006
This may be the last photo you will see of the 6 1/2 x 15 until he is an actual production form. There is still fractional detailing left to go, and I'm not real sure it would show up much better than what you see now in this small of a photograph. I'll see how he photographs once the final detailing is finished.
April 23, 2006
I had to pull off deer sculpting to do some mold making, so now I'm back into deer mode.
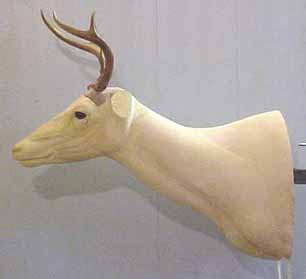
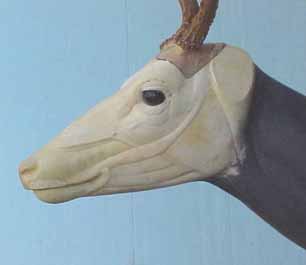
First off, don't pay a whole lot of attention to the shape of the eye lids that I have around the eyes. in the above photo. I set the eyes in and level the pupils so that I have some kind of reference point to go by. I do that with white Roma because gray messes with my "seeing". I just stuck them in for the photo.
Something you might find of interest, all three of the above photos were taken with the same piece of blue styrofoam insulation board for a background. The first two were taken indoors using different artificial light sources, the third one was taken outside in the shade and then I used a photoprogram to lighten up the under exposed photo. That was the closest of the three in producing proper color.
Back to the deer head photo. There really isn't much left to finishing this one out now. The lip line will get a slight more angle added to give the lip flews a better shape, the angular facial vein/artery gets finished out, a little more "fleshiness" over the lacrimal, and just a tad more work on the ear butt muscle section.
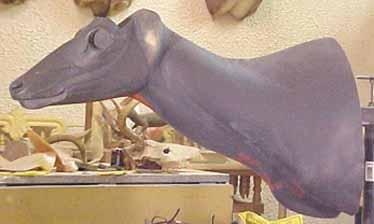
The black looking neck you see is caused by a primer/sealer I am using. Once the head is detailed out, it will get the same treatment. Forget another photo at that point, the sculpt would only show as a silhouette. Once I am at that point with it, I start making it's mold.
April 29, 2006
Forget what I said about forgetting about another photo after the primer. By the time I shoot it with another coat of primer, and a clear sealer, I suspicion it might photograph quite well. We'll see what happens.